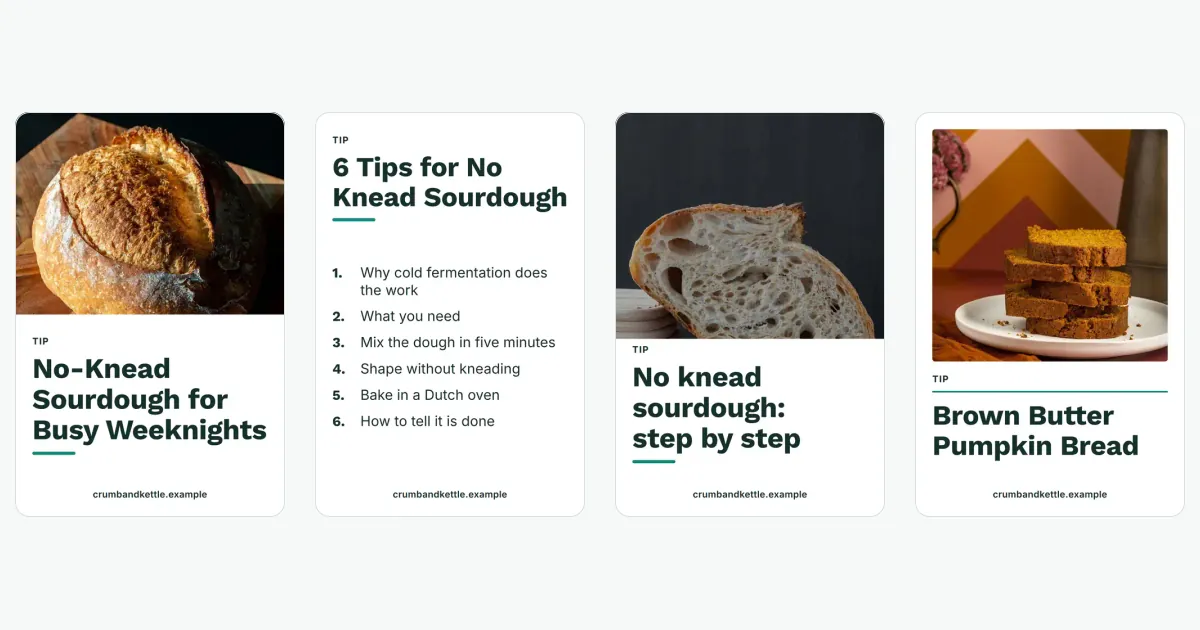
You hit publish on a post you spent a weekend on. You make one pin, share it, and move on. Two weeks later the pin has a handful of impressions and the post has almost no Pinterest traffic. One post can feed a week of fresh Pinterest pins, and this guide shows how.
The post was fine. The problem is that one pin is one lottery ticket. Pinterest works more like a search engine for ideas, and the people who search it respond to different images and different words for the same topic. The good news is that one post can feed a whole week of pins, and you can do it without posting the same thing over and over.
This guide shows you the routine, what Pinterest itself says about it, and the mistakes that get accounts into trouble.
What Pinterest actually rewards
You will find plenty of confident claims about “the algorithm” online. Here is only what Pinterest says on its own help and business pages.
Fresh, original pins. Pinterest’s help article on Pin performance and distribution tells you to “publish your own Pins with fresh, new content instead of saving other people’s Pins.” The same page asks you to create pins “frequently and consistently.” Pinterest’s guide to creating pins for business puts a floor on it: create new original pins at least once a week.
Keywords where people read them. The same performance article suggests going back to older pins and adding keywords to the pin title and the pin description, and to board titles and descriptions. The business guide says to give boards clear, descriptive titles, and its example is “Easy no-bake dinners.” Think of a pin as a tiny search result. If nobody could guess what it is about from the words, nobody will find it.
A vertical image. Pinterest’s ad specs page recommends a 2:3 aspect ratio, or 1000 by 1500 pixels, and warns that images wider than 2:3 might get cut off in feeds. That page is written for ads, but it describes the standard image format, and the performance article above also advises a vertical aspect ratio. For your blog pins, 1000 by 1500 is a safe default. Not sure about the exact sizes? The free Pinterest image sizes tool lists them.
A pin that matches the page it links to. Pinterest says the images, text and keywords in your pin should match the details on the landing page. If the pin promises “10-minute weeknight pasta” and the post is about pasta history, people leave and the pin suffers.
A site that works. The performance article also asks you to keep links working and your site loading in under four seconds.
Video is welcome. Pinterest lets a pin be an image or a video, and the help article on creating a pin lets you choose a cover for your video. Video is a good fourth or fifth pin in your week, not a requirement.
One more honest note. There is no magic number beyond Pinterest’s weekly floor, and anyone who gives you an exact daily number as “the official rule” is guessing. Aim for steady and varied, and watch your own numbers.
The routine: one post, five or six fresh Pinterest pins
Block out about 45 minutes per post. Do this right after you publish, while the post is fresh in your head.
Step 1: Pull out the angles
Open your finished post and list the different reasons someone might want it. A banana bread post, for example, has several:
- the recipe itself (“moist banana bread with brown butter”)
- the shortcut (“one-bowl banana bread, no mixer”)
- the problem it solves (“what to do with overripe bananas”)
- a tip inside the post (“the trick for a crack down the middle”)
A DIY or travel post works the same way. A weekend in Lisbon is also “what to eat in Lisbon,” “where to stay,” and “a one-day Lisbon route.” Each angle is a different search and a different pin.
Step 2: Pick one keyword per pin
For each angle, choose the phrase a person would type into Pinterest search. Type the start of the phrase into the search bar and see what Pinterest suggests. Use plain, specific wording. Put the keyword near the front of the pin title and work it naturally into the description. Do not paste a list of keywords. That reads as spam to people and does nothing for them.
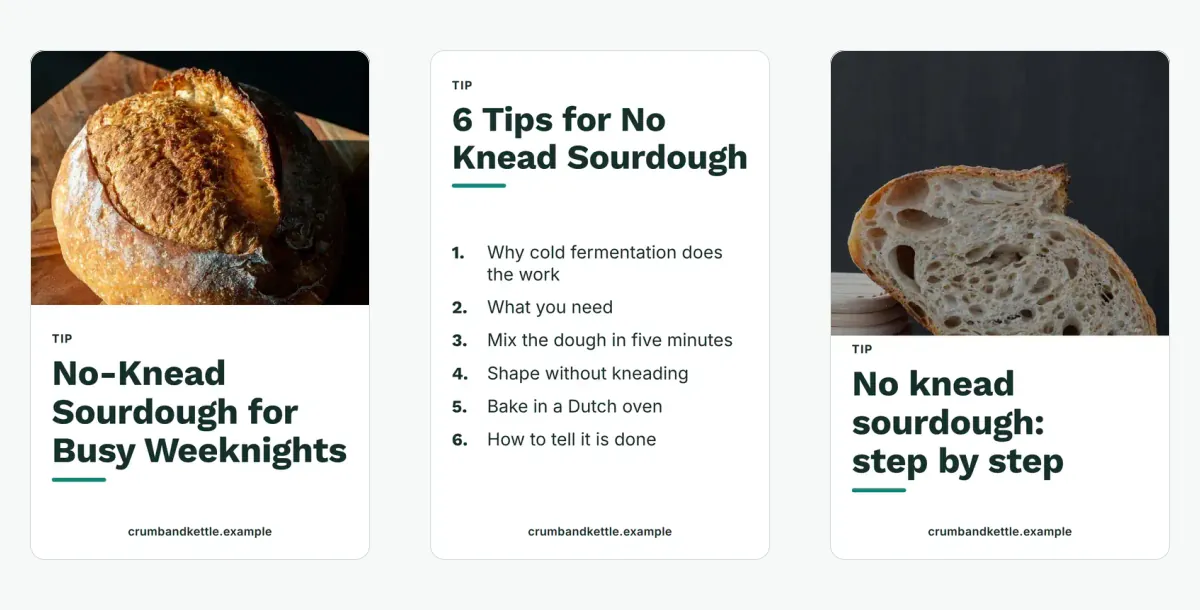
Step 3: Make each pin visibly different
This is the step that keeps you out of trouble. Each pin should present a different idea, not a re-skin: a different angle, photo and headline, in a different format. Pinterest’s Pin performance and distribution article advises against repeatedly saving the same pins or uploading content that already exists on Pinterest, and warns that you may be flagged as spam and temporarily blocked from creating pins. So do not export the same image six times.
For each pin, change at least two of these:
- the main photo or crop
- the headline on the pin
- the layout and colours
- the format (one image pin, one step-by-step or list pin, one short video)
A list pin that shows the steps of the recipe and a photo-first pin of the finished loaf look like two different ideas, because they are.
Step 4: Write the title and description by hand
Pinterest’s ad specs (the same standard image format) allow up to 100 characters for a title and say only the first 40 or so may show in feeds. They allow 800 for a description and say it does not show in the home or search feed, so write it for search and for people who open the pin. Lead the title with the part that matters, and check your length with the free Pinterest character counter.
A simple pattern for the description: one sentence that says what the pin shows, one that says what you get from the post, then the keyword phrase once or twice in normal words.
Step 5: Choose the right board and tags
Save each pin to the board that fits its angle. A descriptive board name helps search. When the pin form offers it, add related topics. Pinterest’s pin creation page says you can add up to ten.
Step 6: Space the pins across the week
Do not publish all six pins in one afternoon. Pinterest lets you schedule pins up to 30 days ahead, with up to 10 pins scheduled at a time. A simple week looks like this:
| Day | Pin |
|---|---|
| Day 1 | The main recipe or guide pin |
| Day 2 | The shortcut or “easy” angle |
| Day 3 | The problem-solving angle |
| Day 5 | A step-by-step list pin |
| Day 6 | A short video pin |
| Day 7 | A fresh photo-first version of the best performer |
Pick times you can keep up. Consistency counts more than a perfect posting hour.
Step 7: Check what worked and repeat
Pinterest analytics shows core metrics such as saves and pin clicks, plus outbound clicks. My advice is to watch outbound clicks most for a blog, because they are the visits to your site. After a week, look at which angle earned the most outbound clicks and make another pin like it for the same post. Pinterest also notes there is no set engagement window, and good pins can resurface seasonally, so a pin that did little in week one may do well next autumn.
Common mistakes
Posting the same image again and again. It is the fastest way to look like spam. Change the image, the headline and the angle.
Keyword stuffing. One clear phrase in a readable sentence beats ten crammed in.
A pin that does not match the post. Misleading pins bring clicks that leave at once.
Forgetting old posts. Your archive is full of posts with no pins. Pinterest suggests refreshing keywords on older pins, and a post from two years ago can get new pins today.
Saving other people’s pins to look busy. Pinterest asks for your own fresh content. Reposting other people’s pins to fill a schedule is not the same thing.
Slow or broken links. A pin cannot send traffic to a page that does not load.
Burning out in week two. A routine you can keep up for months beats a burst of 40 pins in one weekend.
Doing this by hand versus doing it with a tool
Done by hand, this routine takes time: the angles, the designs, the writing, the scheduling. For one post a week it is doable. For a blog with 200 posts, it is where most people give up.
That is the job Bloomtack is built for. You connect your blog, and Bloomtack makes pin designs from each post, including list and step pins built from your post’s headings (see how it works). You approve each pin yourself, and nothing posts without your say.
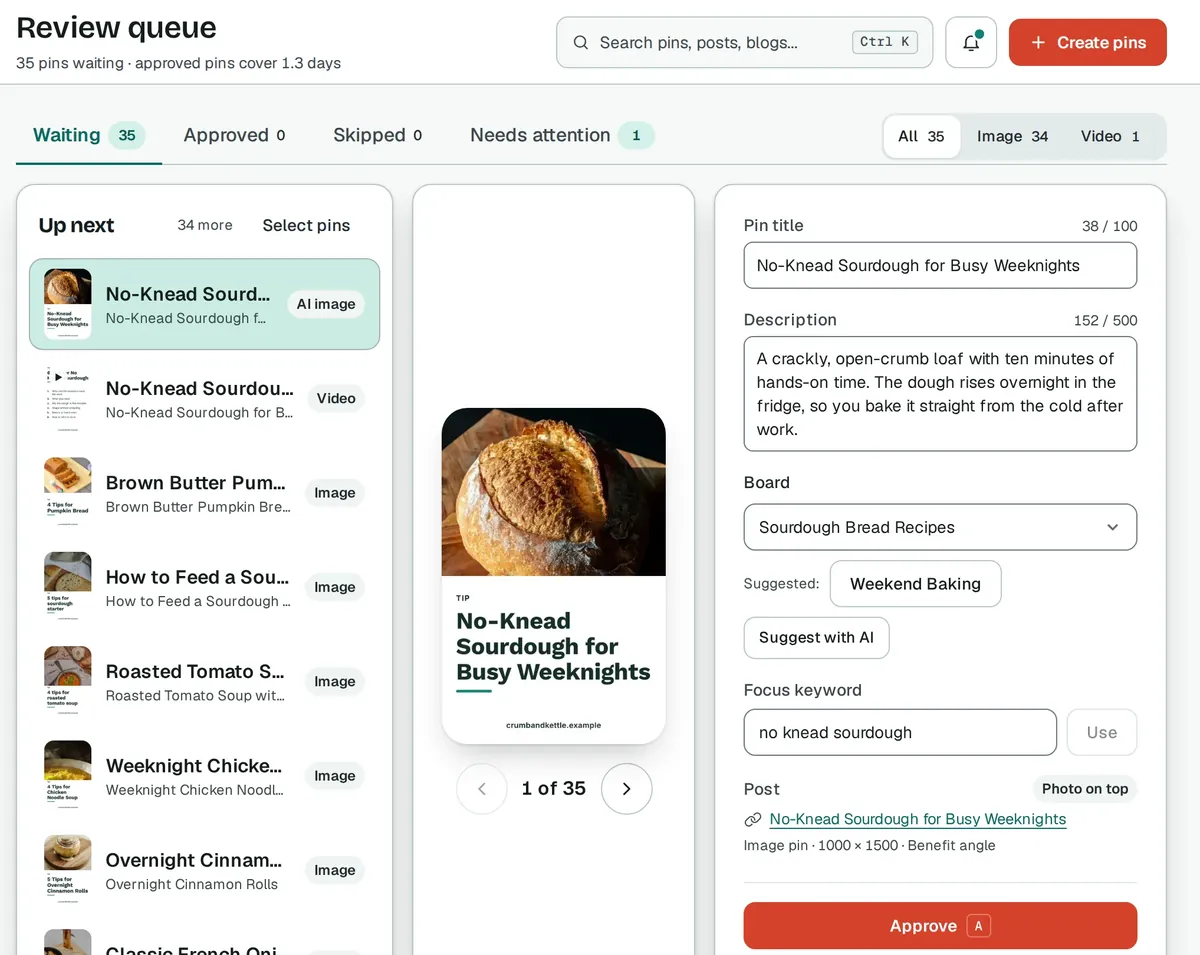
Bloomtack’s Pinterest scheduler publishes through Pinterest’s official API at varied times, tracks which designs earn clicks on your account, and keeps pacing moderate. AI features are optional and run only on an AI key you connect yourself.
Every plan starts with a 3-day free trial with 2 accounts, 2 blogs, 50 pins and 10 videos, and full limits from your first payment (see the trial limits on the pricing page). A card is needed at checkout, you can cancel in one click in Settings, and your plan is charged only if you stay past day 3. If you would rather do it by hand, the routine above works without any tool.
Either way, start small. Take your most recent post, write down four angles, make four different pins, and schedule them across this week. Then look at your outbound clicks and let the numbers tell you what to make next.